To install STUX on hard disk:
STUX CONTROL CENTER -> SETUP -> Live CD -> Install STUX -> Install on Hard Disk
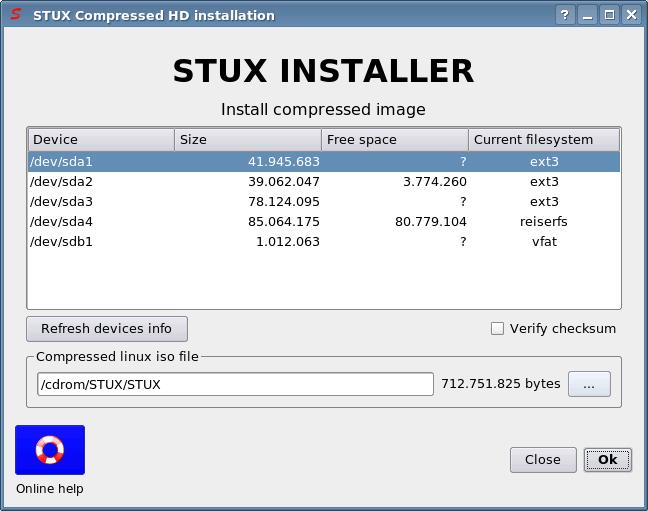
you will see a window like this:
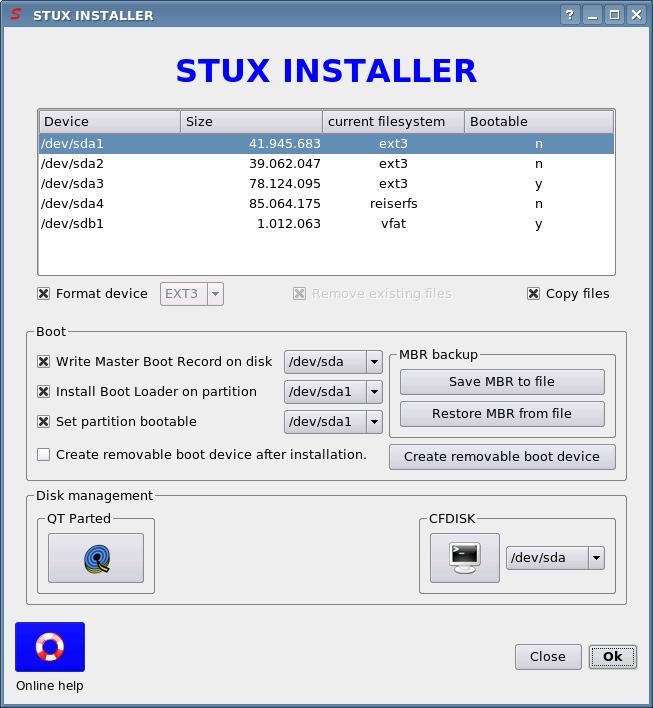
Select the partition where you wish to install STUX.
Checkboxes:
- Format device
If checked, the selected device will be formatted.
- Remove existing files
This option is enabled only if the 'Format device' checkbox is unckecked.
If you choose to not format the target Hard Disk, with this checkbox you can choose to remove the existing directories (/bin /boot /dev /etc /home /lib /opt /sbin /usr /var /root /tmp) before copy the current one. This option could be used to restore a damaged installation without loose files created in system directories.
- Set selected Hard Disk bootable
If checked, set the bootable flag on the selected Hard Disk.
- Write Master Boot Record (MBR)
If checked, GRUB boot loader will be installed in the primary partition of the boot device.
WARNING: existing Master Boot Record will be overwritten ! You are strongly suggested to use the button 'Save MBR to file' to make a backup of your current Master Boot Record (MBR).
Other operative systems, like Windows™, should be recognized and automatically added to GRUB boot menu. The GRUB boot menu is customizable editing file /boot/grub/menu.lst located in the primary partition of the boot device.
- Copy system files
If checked, files are installed. Do not check in order to only restore boot record and loader.
- Create removable boot device after install
If checked, the program that creates boot floppies/CDROM/USB is called after installation.
If you need to restore a damaged boot loader, for example, select the boot device and check 'Set selected hard disk bootable', 'Write master boot record', 'Install GRUB loader on Hard Disk' and uncheck other checkboxes; invert checkboxes if you need to install STUX on selected device but you want to keep boot configuration intact.
D.M.A.: You have to manually activate D.M.A. on hard disks the first time you access STUX after installation.
Note: The resulting installation will be a clone of the packages and configurations currently present in the Live CD session.
You can even choose to not install some packages by simply uninstalling the new packages (use 'qtswaret' or 'removepkg' to remove packages) from the Live CD session before hard disk installation.
You could also add new packages to the resulting installation by installing new packages (use 'swaret', 'qtswaret' or 'installpkg' to add new packages) before hard disk installation.
This approach has the advantage that you can fully configure and test the system before installing it on hard disk; for example, if you have configured the network in the Live CD session (before hard disk installation), that network configuration will be kept also in the resulting installation.
When running from Live CD, and configuration is not saved persistently, the Knoppix hardware autodetection makes the hard work of autodetect and configure devices: when you install STUX on hard disk, the current configuration files are installed on the target device (created by Knoppix autodetection) but when you boot from hard disk (or when you boot from Live CD with a persistent configuration) the Knoppix autodetection is skipped (because devices have been already configured by Knoppix autodetection or manually).